


Zoom Information
Zoom is the University of Idaho's video conferencing platform. It allows for two-way real-time video conferencing between two or more locations via a virtual meeting room. Participants can connect to a Zoom meeting from their computer, phone or even a classroom codec system. All participants do not need to connect using the same method. Zoom is versatile and can accommodate multiple participants across multiple platforms. At the College of Law, we use video conferencing quite extensively to interact between our two locations. Therefore, it is important to understand how to use Zoom for when it is required for a class, event or meeting.
Zoom meetings can be scheduled through the web, Zoom desktop client or directly from Outlook using the Outlook plugin. This page will cover when you will need to use Zoom and how to set up and manage Zoom meetings.
The University of Idaho has a site license for Zoom. This means that all faculty, staff and students at the U of I have access to a Zoom Pro account. You can access your account at https://uidaho.zoom.us/. This means that anyone associated with the University of Idaho can host their own Zoom meetings whenever they need. Be aware however that you can only host one Zoom meeting at a time per Zoom account. This means that while you can schedule as many Zoom meetings as you would like, you can only be connected to one of those meetings at a time. So be mindful of overbooking when scheduling meetings for groups or events.
Due to the limit on the number of active meetings that Zoom allows per account, anyone organizing an event, class or meeting that requires Zoom will need to schedule the meeting on their own account and provide the meeting info to LawTech prior to their event. LawTech will still support and setup College of Law meetings using Zoom, but the meeting info will need to be provided by the organizer.
The College of Law has several classrooms with video conferencing equipment already built into the room, but Zoom is needed in order to connect the room to a meeting. Any video conferencing event at either the Menard Law building in Moscow or the Front St. building in Boise will need to connect via Zoom.
Zoom meetings will need to be scheduled by professors for classes and by event organizers for any events. Students participating in a distance class will need to connect the classroom before class begins. For events, event organizers must arrange to have someone present in both locations in order to log into the computers and connect and manage the meetings. For security purposes LawTech cannot set up the meeting for you.
A standard Zoom meeting can support 300 participants, but there may be a need for a larger meeting with more refined control over interactions. In these cases, it may be more beneficial to create a webinar. In a webinar, certain users are listed as Panelists while others are listed as Attendees. When connecting to a webinar, only the panelists will be seen and heard in the meeting. Attendees will simply be watching. Zoom webinars have a Q&A feature that will allow attendees to submit questions that will be viewable only by the hosts and panelists. You can also set up pre-registration for Zoom webinar. This requires participants to register in advance for the event and allows you to keep track of the number of participants to expect. Webinars allow viewing and participation from a large audience without everyone having a camera and microphone active in the meeting. This cuts down on disruptions and allows events to proceed more smoothly.
Webinars are suggested for any large format events where managing participants will be too unwieldy to handle during the event. Webinars should also be used in the case of public events. Firstly, the webinar format keeps the event safe from unwarted or malicious interactions. Secondly, U of I security requires authentication on Zoom meetings. This prevents anyone without a U of I account from joining a meeting. However, this is not the case with webinars. If you are having an event that is open to the public, it should be set up as a webinar.
Webinar licensing can be granted temporarily on an existing U of I Zoom account. If you are hosting an event and would like to schedule it as a webinar, you can request a temporary webinar license here. On this page, click the "Request a Service" button in the upper right hand corner. Fill out the form and be sure to select "Zoom Webinar Licensing" from the "Type of Request" dropdown. U of I ITS will process the request and respond when your license is available.
Using the Zoom desktop client:
The Zoom desktop client is what runs your meetings when hosting or connecting to a Zoom meeting. Whether you join a meeting from the web, and email link or directly from the desktop client, Zoom will redirect to the desktop client and launch the meeting there. All U of I Zoom meetings require you to be logged in to the desktop client with your U of I credentials in order to join a the meeting. For U of I owned and managed computers, Zoom is deployed through the Software Center. For personal computers, you can download the client here. Log in and click the "Download" button for "Zoom Client for Meetings". This will download a desktop application that you can use to schedule, manage and join Zoom meetings.
Once Zoom is installed on your computer:
- Open the Start menu in Windows or Launchpad in MacOS and run the program.
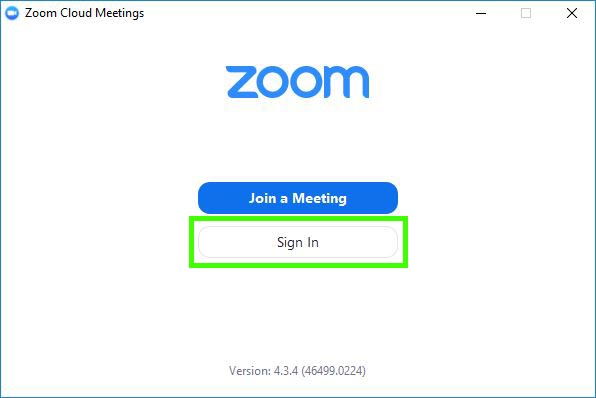
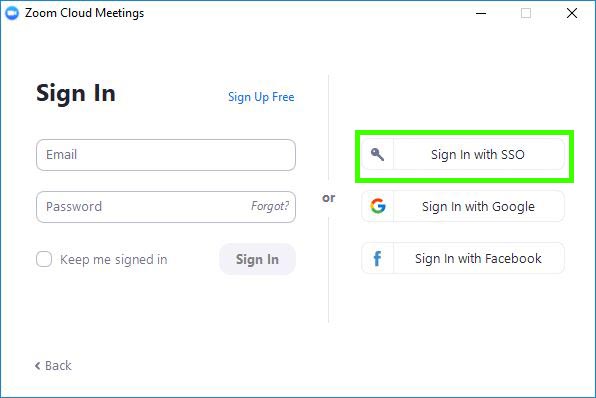
- Click "Sign In"
- From the sing in options provided, click the "Sign In with SSO" option on the right.
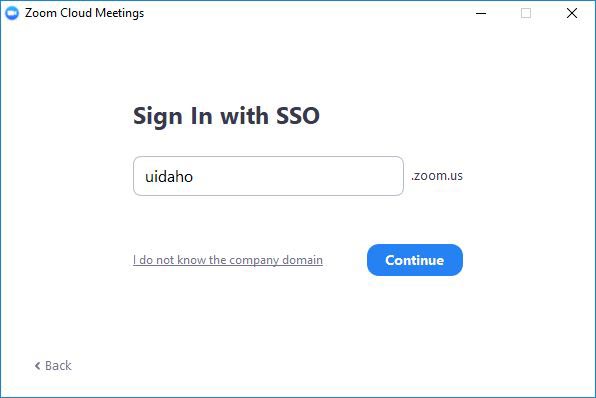
- In the "Enter your company domain" field enter "uidaho"
- Sign in with your U of I NetID credentials.
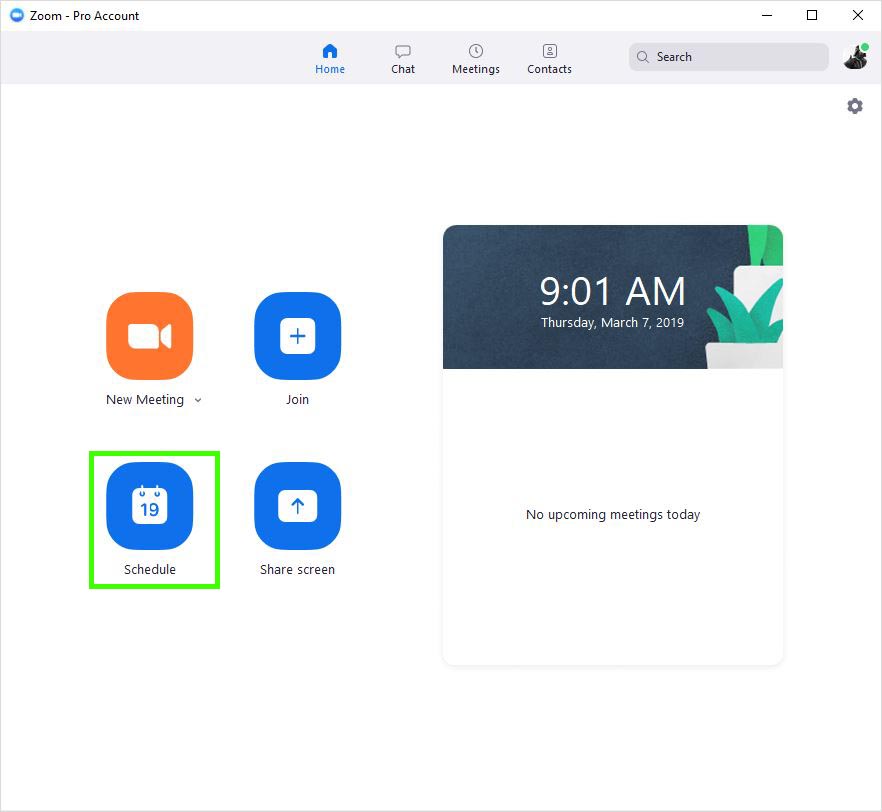
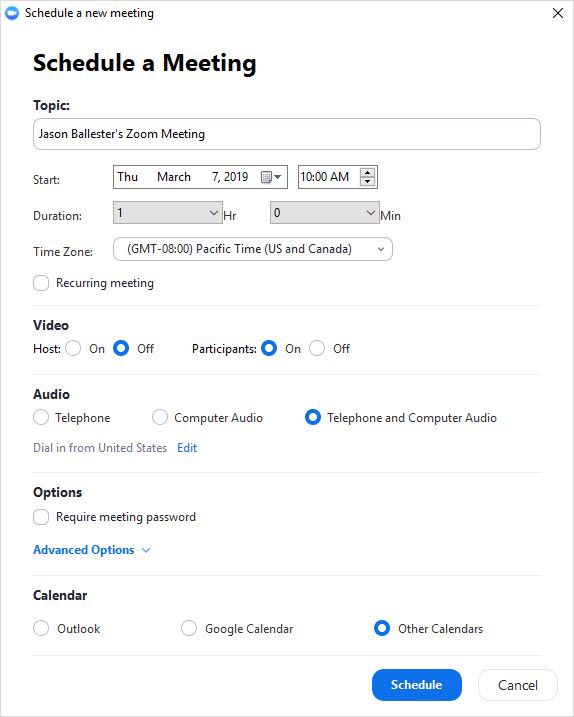
- From the Zoom app Home screen you can join an existing meeting or schedule a new one. To schedule a meeting click the "Schedule" button
- Enter your meeting info. (name, start time, duration, etc.)
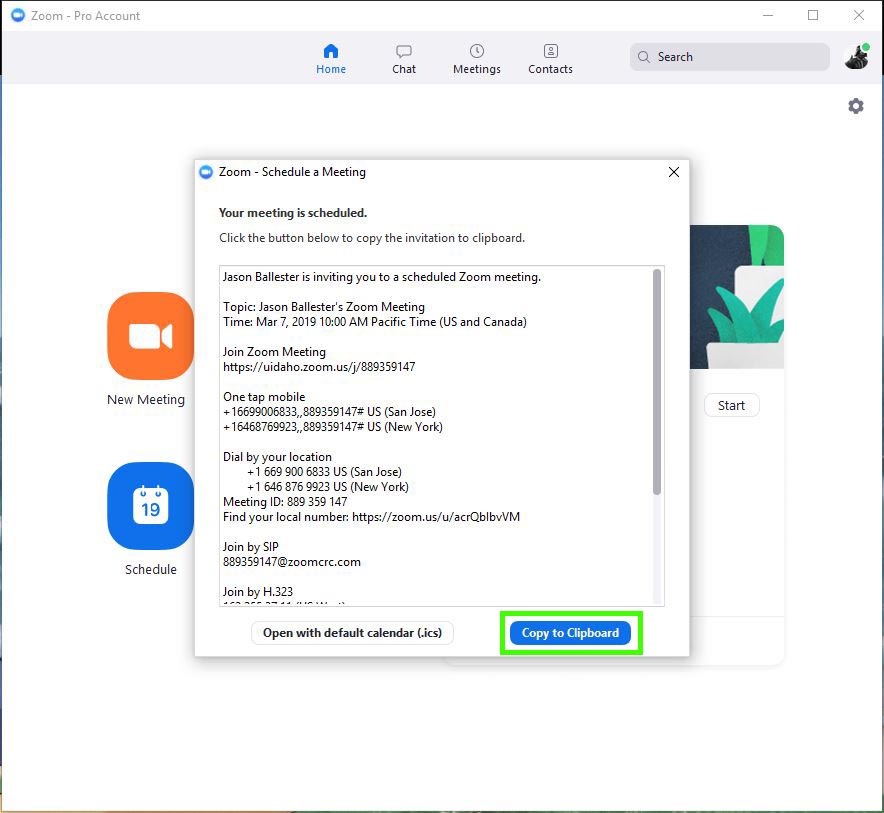
- At the bottom there are several options for "Calendar". If you select "Outlook" or "Google Calendar" you will be prompted to log in to the respective platform, and it will open an Outlook or Google Calendar event with the Zoom meeting info included in the description. If "Other Calendar" is selected A window will open with the Zoom meeting details. You can click "Copy to Clipboard" and paste these into an email or other calendar event to share them with your meeting attendees.
- Click "Schedule" at the bottom of the window.


Scheduling a meeting from the web:
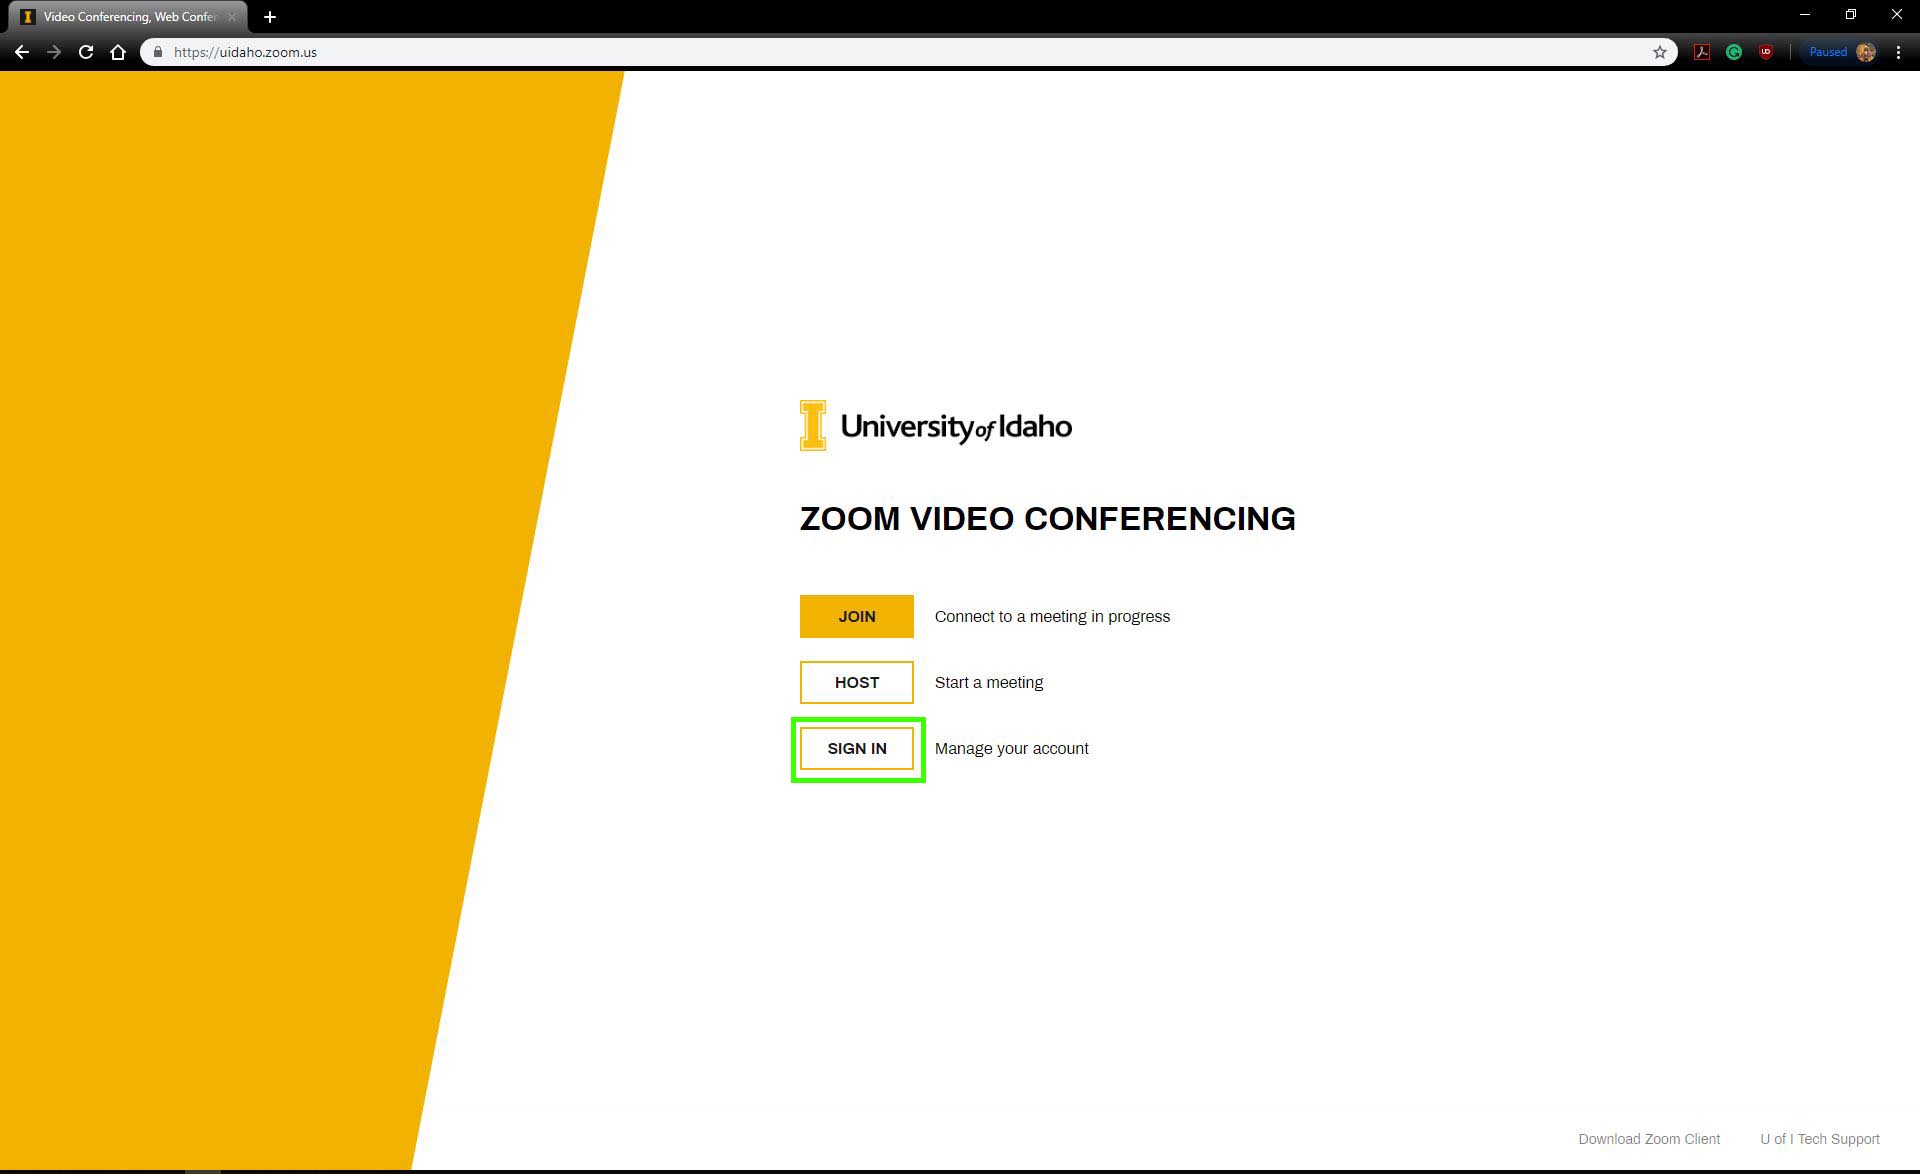
- Open your web browser and go to www.zoom.uidaho.edu.
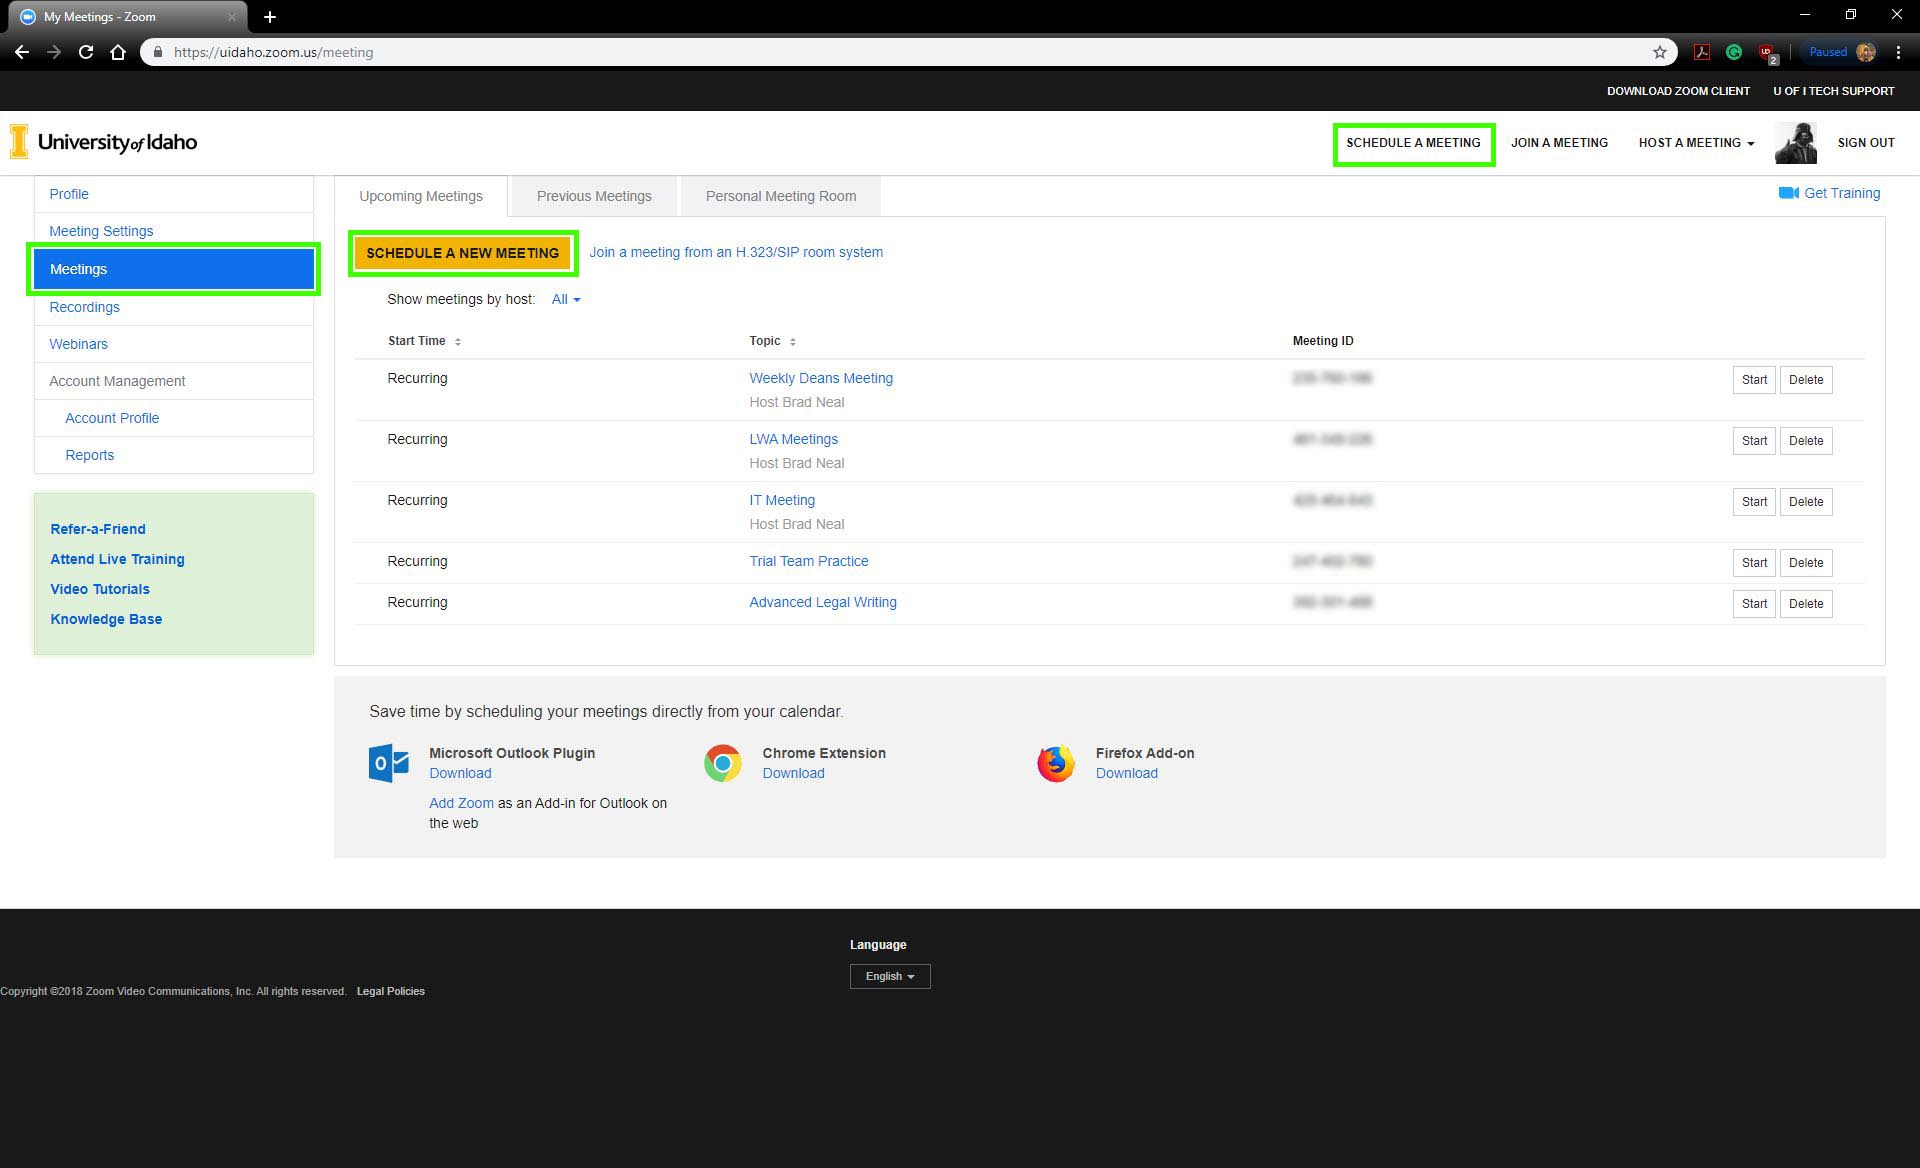
- Click "Sign In" and enter your U of I NetID credentials. This will take you to the dashboard. From here you can see your upcoming meetings, access your profile, view your recordings or edit your meeting settings.
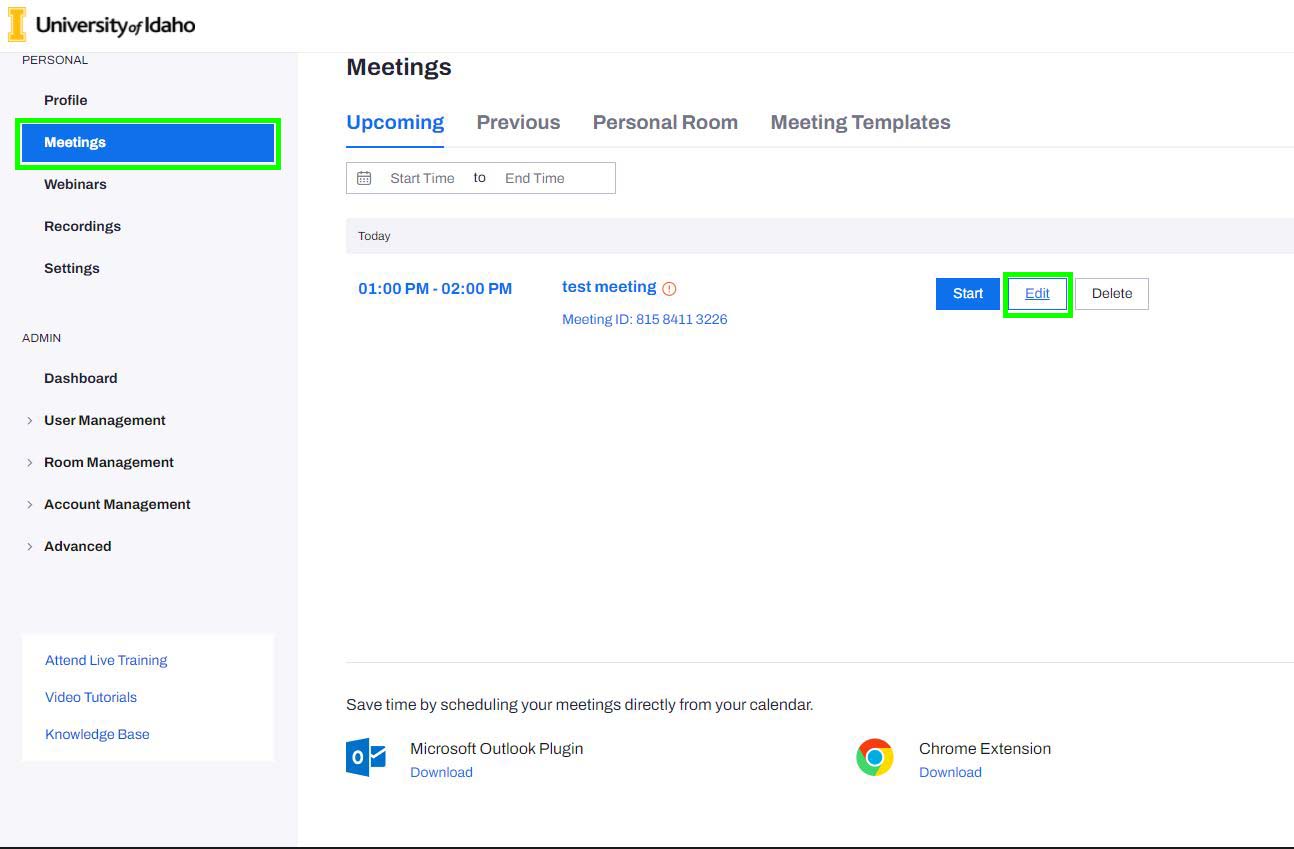
- Click on "Meetings" from the sidebar on the left.
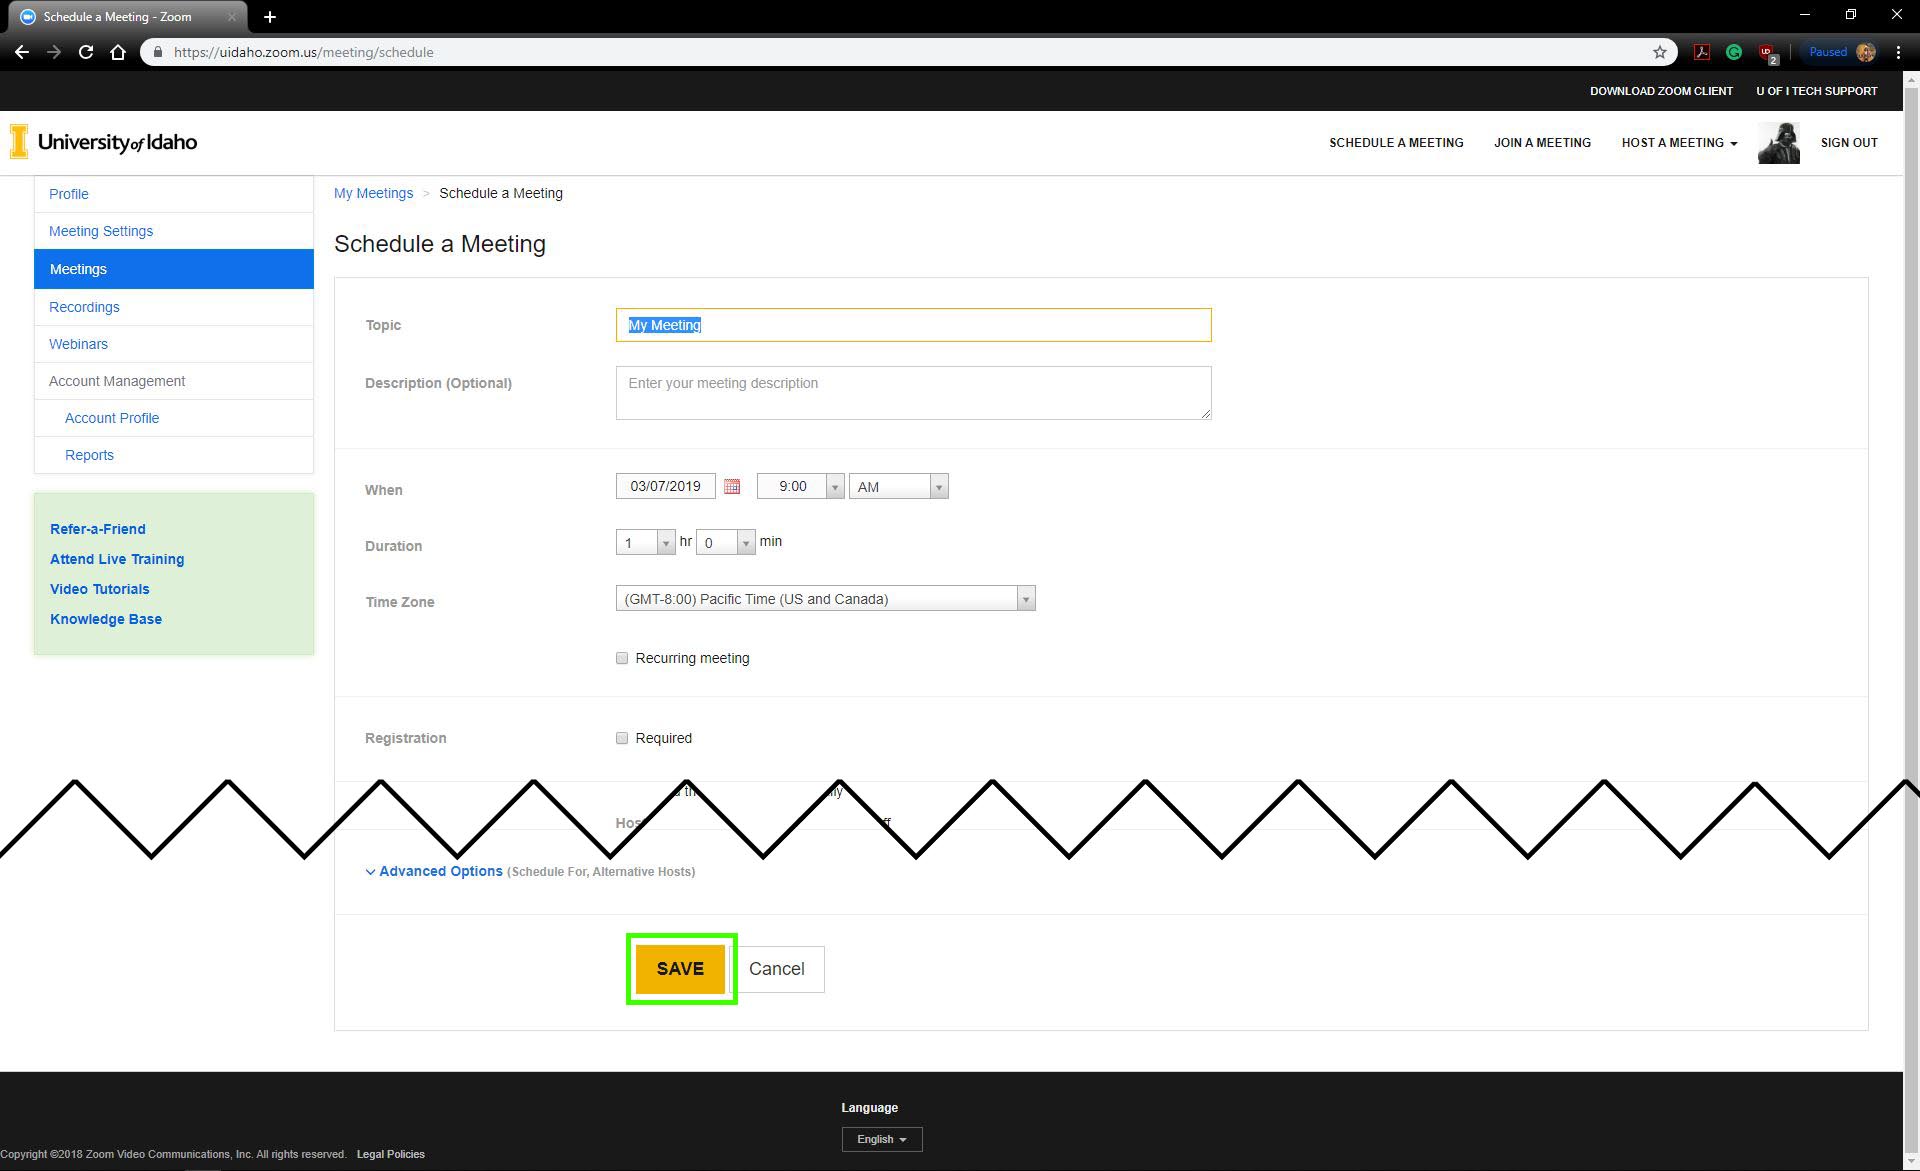
- Click on "Schedule a New Meeting"
- On this page, enter the details for your meeting. (name, start time, duration, alternate hosts, etc.)
- It is recommended that you add alternate hosts to your meeting as a backup in case you are unavailable. This can be done in the Advanced Options section by entering the email address of the person you wish to designate as an alternate host.
- Click "Save" at the bottom of the page
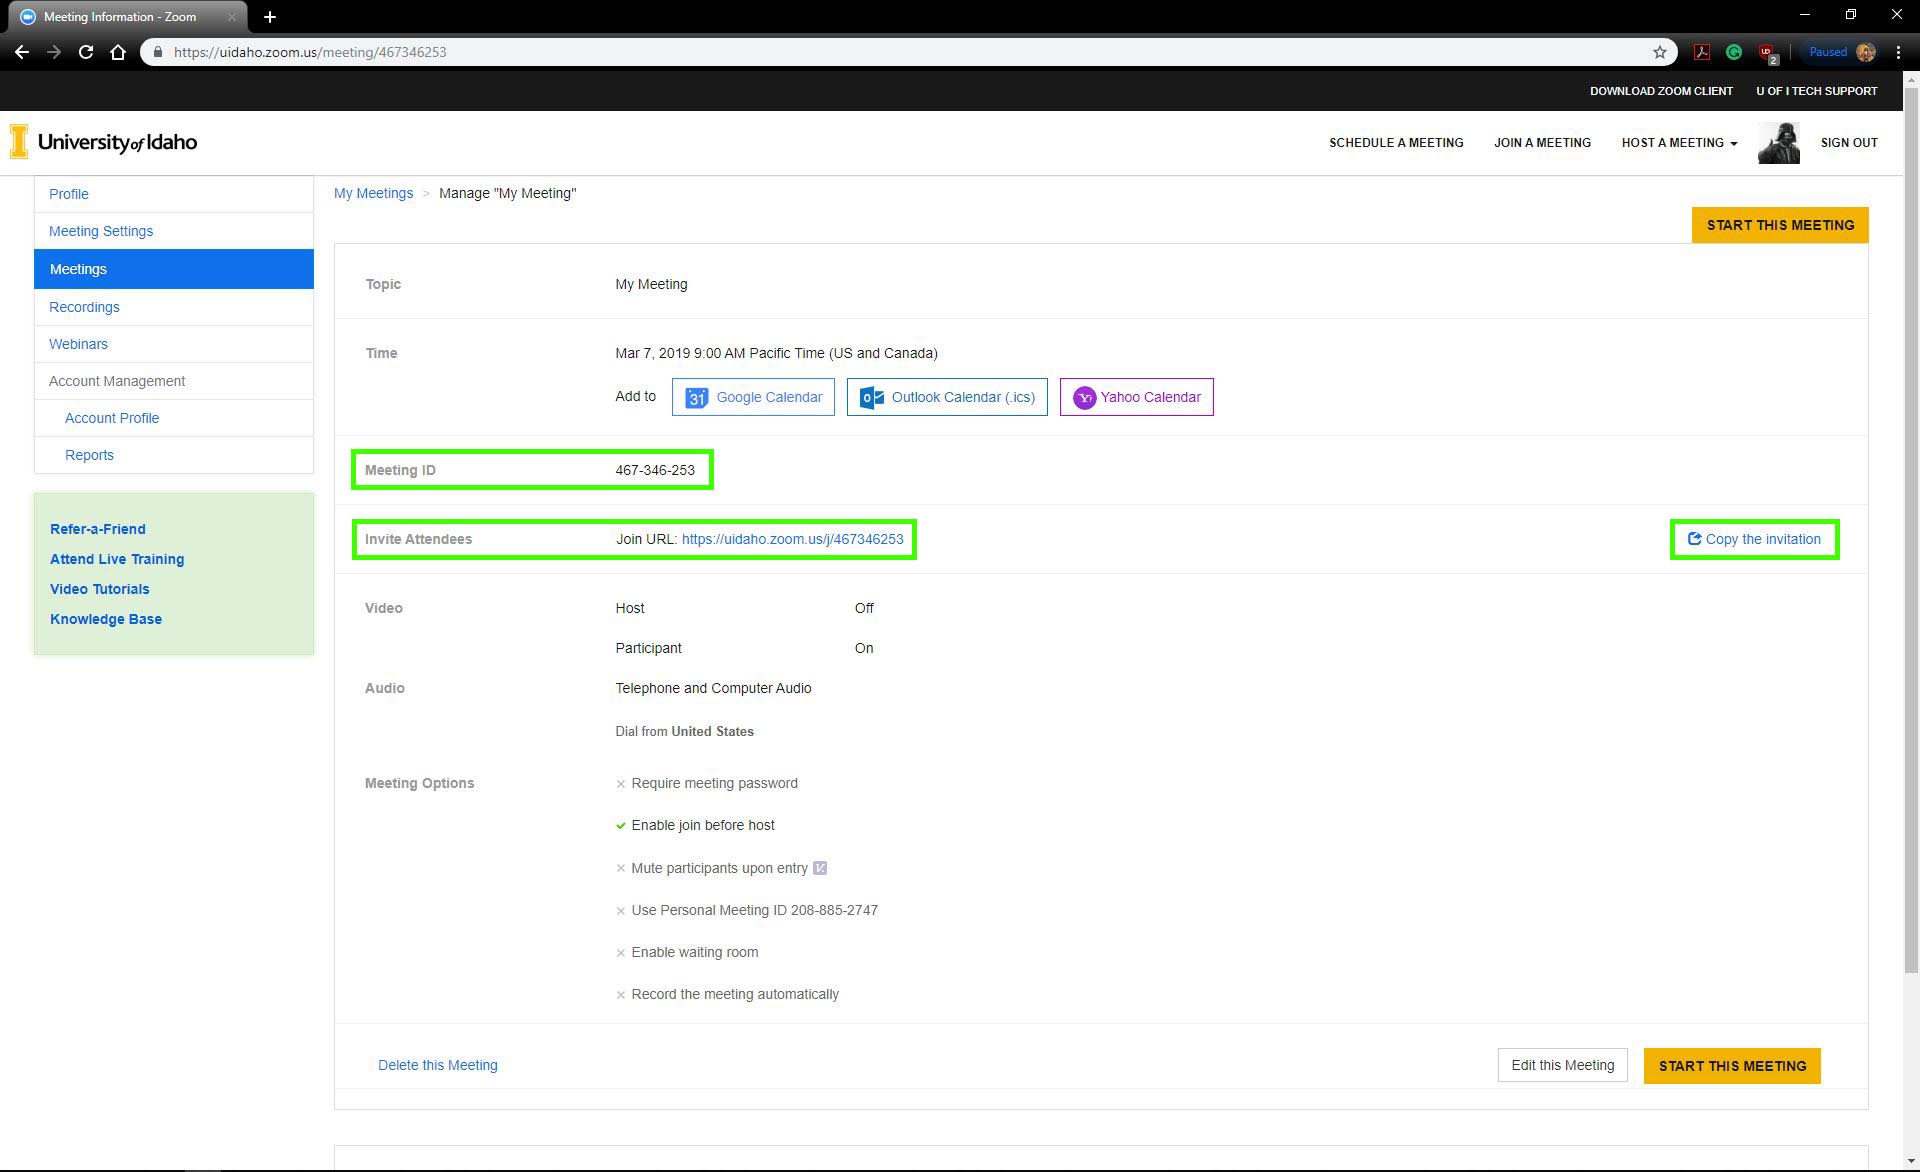
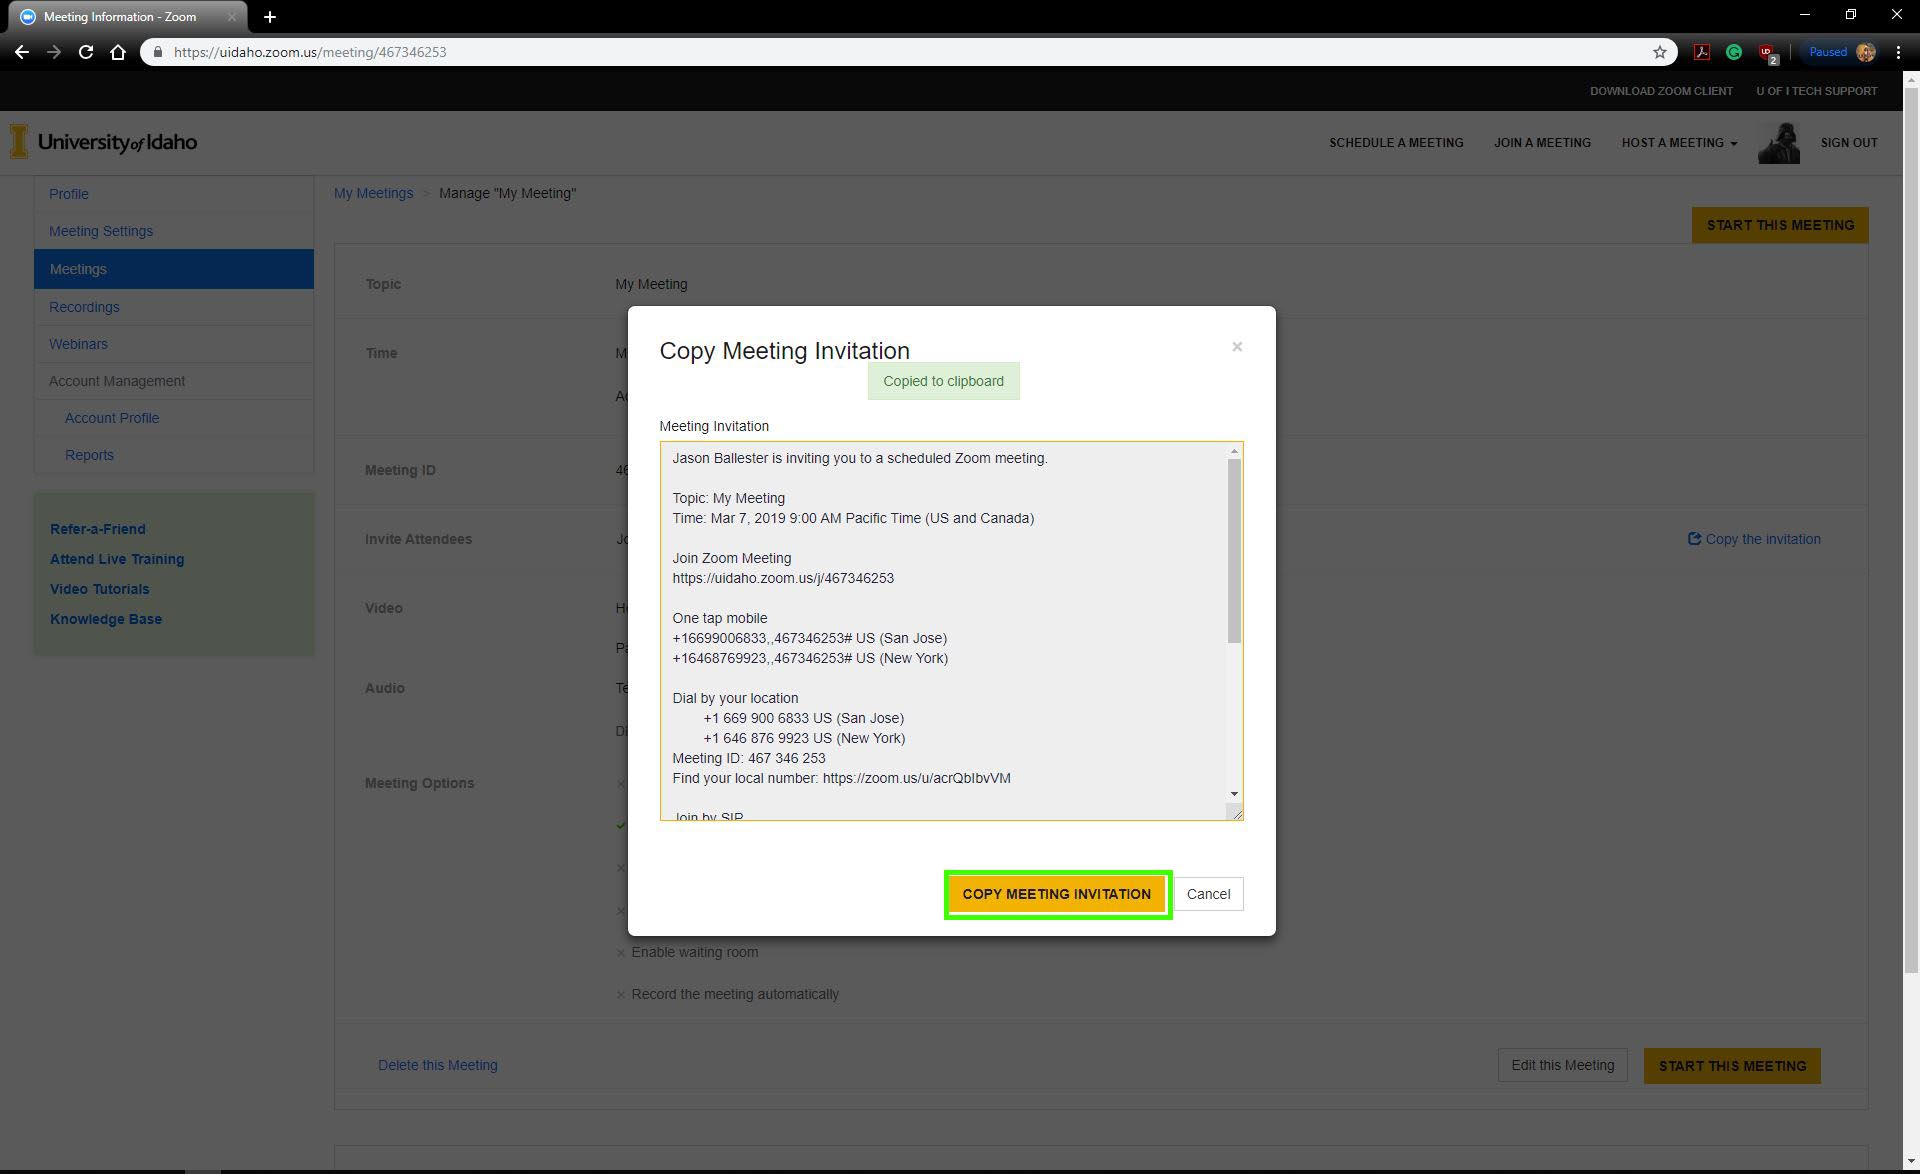
- You will now see the manage page for the meeting you created. This page has the Meeting ID and settings for the meeting. To send the meeting to other participants you can click the "Copy the invitation" link.
- In the popup window click the "Copy Meeting Invitation" button. This will copy the meeting info to the clipboard. You can now paste that info into an email or Outlook event and send it to your meeting attendees.


Granting a Zoom authentication exception:
To prevent unwanted disruptions from unauthorized users during classes and events, U of I security policy requires some form of security to be active on all Zoom meetings scheduled from a U of I account. The default and recommended option for this is user authentication. This method will only allow participants to join a Zoom meeting if they are logged in to the desktop client with a U of I account. It is possible however, to grant an exception to a non-U of I account in cases such as having a guest speaker. The following instructions will outline the process of granting an exception to a non-U of I email address for a meeting.
- Log in to U of I Zoom webpage as outlined above.
- Click on the "Meetings" tab on the left.
- Scroll to the bottom of the page for the meeting and click the "Edit" button.
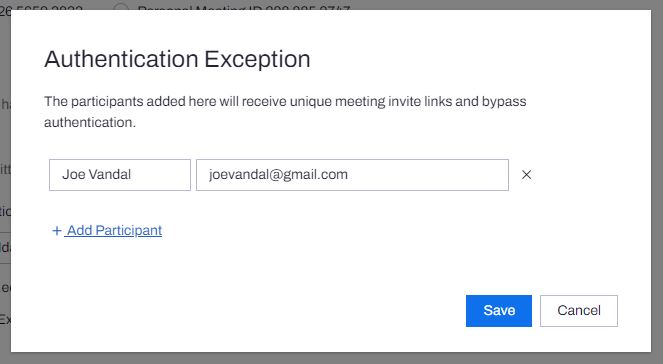
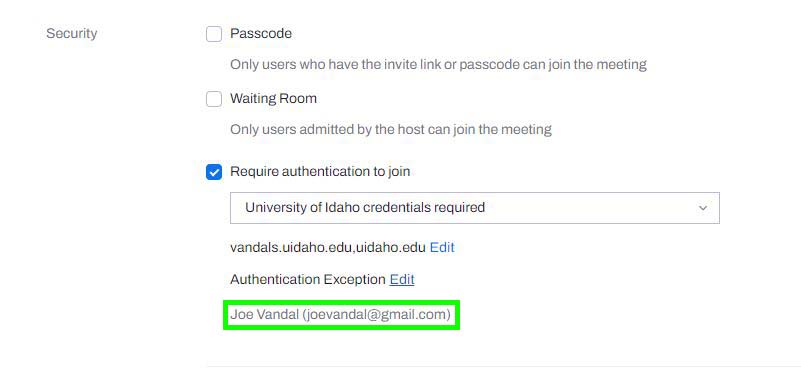
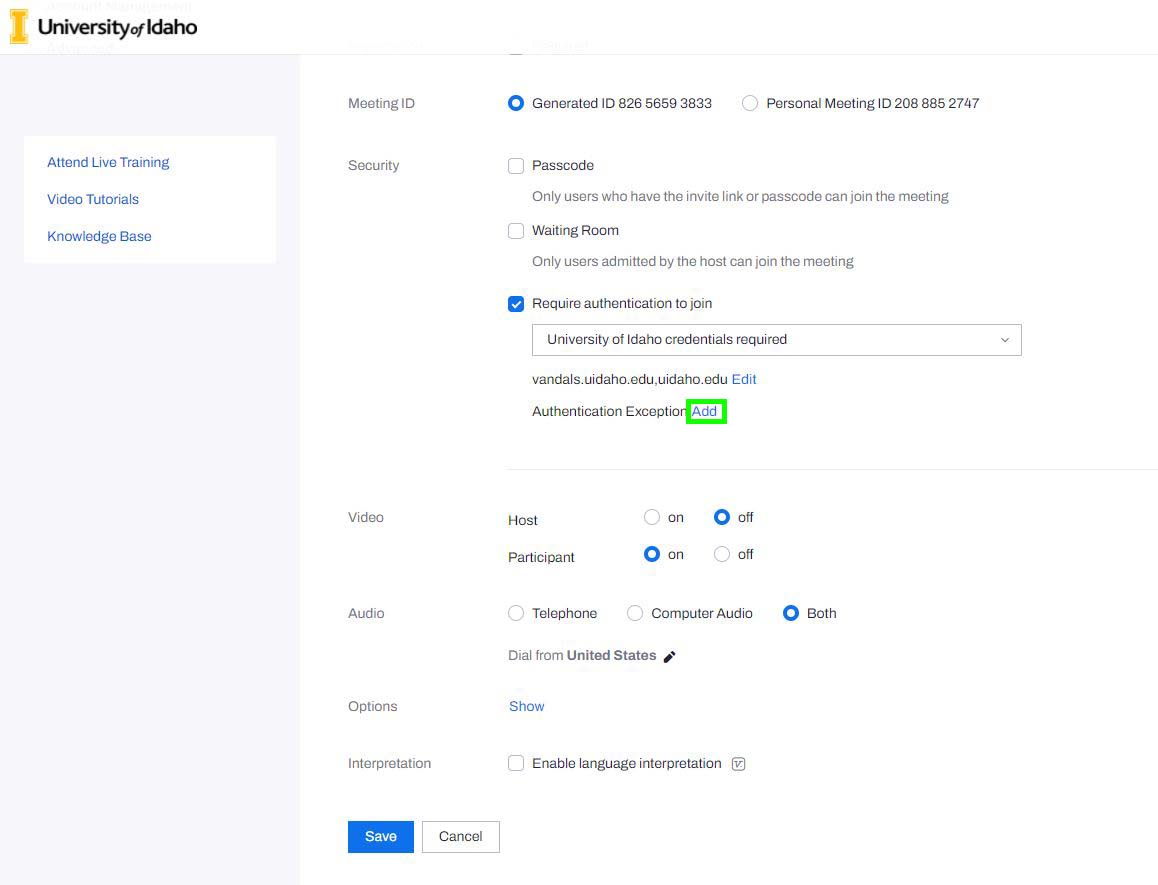
- In the meeting settings, scroll to section labeled "Security". Under the "Require Authentication to Join" click the "Add" button next to "Authentication Exception"
- In the pop-up window, enter the name and email address of the person who needs the exception.
- Click "Save". This will automatically generate a unique Zoom link and email it to the email address listed in the exception. The user will be able to access the meeting if they use this unique link.
- After adding an exception, you can see all exceptions that exist for the meeting under the "Authentication Exceptions" heading in the meeting settings.


Zoom Outlook Plugin:
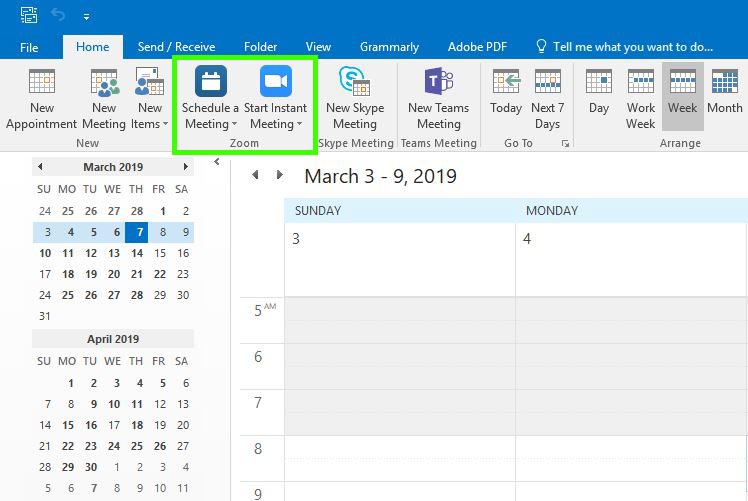
If you use Outlook and like to schedule events in your Outlook calendar, there is an Outlook plugin for Zoom that allows you to schedule and include Zoom information directly in an Outlook calendar event. To use the Zoom Outlook plugin, you will need to download it and the Zoom desktop client here. Once you have installed the Zoom desktop client and logged in, and installed the Outlook plugin, you will see a "Zoom" section in the Home tab of the Outlook ribbon.
NOTE: The Outlook plugin does not work on Mac unless you are on Mac OS version 10.14 (Mojave) or newer. If you are on an older version of Mac OS, you will need to update to Mojave in order to use the plugin.
- Click "Schedule a Meeting"
- You will be prompted to log in to the Zoom desktop client if not logged in. (See Zoom Desktop Client instructions if you are not familiar with logging into the client.)
- Enter the meeting info. (name, start time, duration, etc.)
- Click "Schedule"
- An Outlook calendar event will open with the Zoom meeting info included in the details of the meeting. You can add invitees and share this meeting as normal with an Outlook calendar event, and all recipients will get the meeting info as well.
- Once you have added all details and invitees to the Outlook event, click "Send".